



How to Brief and Check an AI-Built Customer Request App
Specify a request form, database storage, and a staff view for Leina, then verify persistence, validation, and access controls before publishing.
A customer request app starts with a simple idea: let people tell you what they need, then give your team one place to review the requests.
To make that useful, the form needs to save submissions, explain missing fields, and keep the staff view accessible to the right people.
With Leina’s App Builder, you can create full-stack web applications—complete with backend logic and database storage—through conversation. Use the sample brief below to request a first version, then check its actual behavior before sharing it with real users.
Scope a minimal first version
When generating applications with AI, resist the urge to request everything at once (e.g. notifications, CRM sync, file attachments, and priority tags). Start with a lean, verifiable foundation:
| Component | Essential v1 requirements | What to leave out for now |
|---|---|---|
| Public form | Customer name and request details; required-field validation | File attachments and multi-step wizards |
| Database | Persistent record storage with automatic submission timestamps | Automatic priority scoring or AI sentiment tags |
| Staff dashboard | Read-only list of submitted records in reverse chronological order | CRM two-way sync, automated customer reply emails |
| Feedback | Explicit confirmation banner only after database write succeeds | Speculative success states before database confirmation |
Decide who should be able to see each view. For this example, visitors submit requests and authorized staff read them. Ask Leina how it can implement that separation; these are requirements to verify, not a list of built-in controls.
Give Leina a brief with observable specifications
Copy and adapt this starter brief in Leina App Builder:
Build a customer request web app with two distinct views:
- Public Request Form:
- Fields: “Customer Name” and “Request Details” (both fields are required).
- Client and server-side validation: reject empty submissions or whitespace-only inputs with an inline error message.
- Show a success confirmation banner only after the record has been confirmed in the database.
- Staff Dashboard:
- Display all submitted requests in a clean table or list, ordered newest first.
- Show the customer name, submission timestamp, and full request text.
- Access Control:
- The submission form should be accessible to all public visitors.
- The staff dashboard must be restricted to authenticated team members only.
Explain the access controls available for these two views and flag any requirement you cannot implement. Use fictional test records during development. Prepare the app for review before publishing it.
Run four essential acceptance tests
Run these four checks on the test app. They catch useful first-run problems; access and data handling still need review for your intended use.
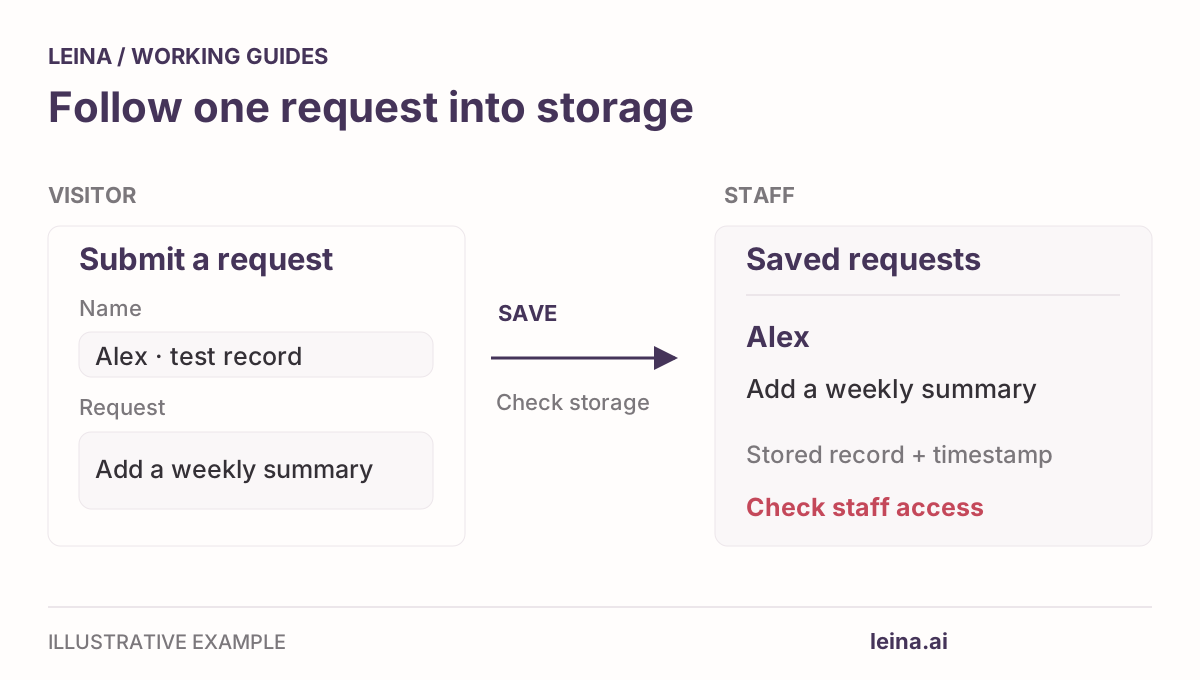
1. Follow a submission into storage
Submit a distinctive request such as “Test: Weekly digest feature”. Check its values in the staff view, reload the page, and then look for the same record in the backend storage or through a separate authorized browser session.
Reloading is a first check, not proof of a database write: browser storage such as localStorage also survives reloads. Inspect the stored record to verify where the data landed. If you cannot inspect it, record that part of the check as unresolved. Add a second request and confirm the first remains unchanged.
2. The empty submission test (Validation)
Try submitting the form with empty fields, or with only blank spaces.
Expected behavior: The form should highlight the missing fields, block submission, and create no blank records in the database.
3. The multiline and special character test (Formatting)
Submit a request containing line breaks, bullet points, quotes, and symbols (&, <, #). Inspect the staff view to verify that formatting is preserved without garbled characters or escaping bugs.
4. The incognito test (Access control)
Copy the URL of the staff dashboard and open it in a private / incognito browsing window where you are not logged in.
Expected behavior: The application should prompt for authentication or deny access. Also test a signed-in account that should not have staff access. A hidden page or a login screen alone does not establish that the underlying data requests are protected. If the required restriction is unavailable, keep the app on fictional data until that is resolved.
Keep track of your observations using the customer request app review checklist.
Revise one behavior at a time
When you encounter an issue, do not ask the builder to “fix everything.” Give concrete, single-behavior instructions:
When I submit an empty request, the form shows a success message even though no record is saved. Please show an inline required-field error instead, keep successful submissions working, and preserve existing test records.
After each fix, verify both the corrected error path and a normal submission to ensure the fix didn’t introduce regressions.
Publish and roll out
Once you have resolved the checks and confirmed the app is suitable for its intended audience:
- Review test data: Identify and remove only the fictional records you created for testing.
- Review access: Verify who can submit requests and who can read the saved records using the controls actually available in the app.
- Publish and verify: Find the app in My Apps and follow the available publishing flow. Repeat a submission and the access checks on the published version before sharing its form link.
Choose someone to review incoming requests, and keep a record of unresolved limitations. Add features once the team has used the small version and knows what it needs next.